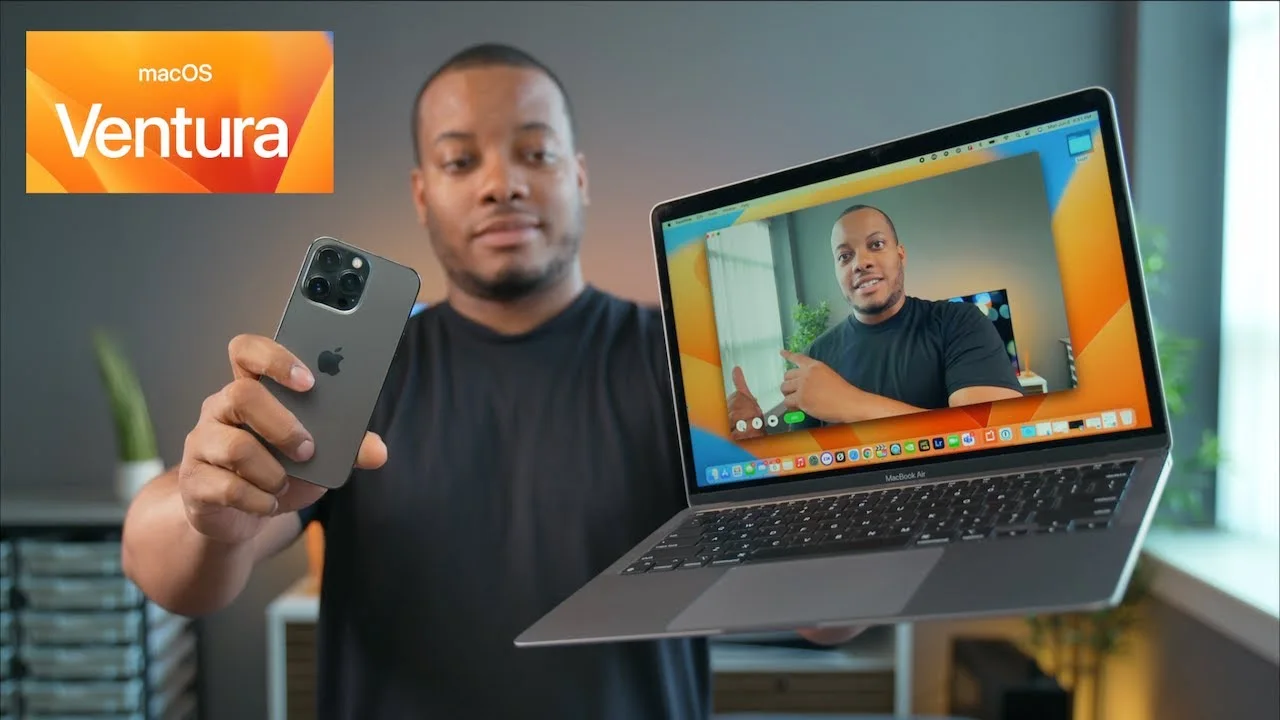
Your Mac’s built-in camera is fine for quick calls. But it struggles in low light. The image looks grainy. And you cannot reposition it easily. That is where Continuity Camera on macOS Ventura and iOS 16 changes everything.
This feature turns your iPhone into a high-quality wireless webcam. No cables. No extra software. Just better video quality instantly. I have used this daily for over a year on client calls and recordings.
This guide covers exactly how to set it up, what goes wrong, and how to fix common issues. No fluff. Just practical steps from real use.
What Is Continuity Camera? (And Why You Want It)
Think of it this way. Your iPhone has a incredible camera. Your Mac has an average one. Continuity Camera lets you borrow your iPhone’s lens for your Mac. You get better resolution, better low-light performance, and special effects like Center Stage and Portrait mode.
Read Also: M5 Neural Engine Performance Specs: The Secret Behind Apple’s On-Device
The feature works wirelessly over Wi-Fi and Bluetooth. Or you can plug in via USB for a wired connection. Once connected, any app on your Mac that uses a camera, FaceTime, Zoom, Webex, Riverside, QuickTime—can use your iPhone instead.
The best part? You do not install anything. The feature is built into macOS Ventura and iOS 16. It just works when the conditions are right.
System Requirements: Does Your Gear Work?
Before you try anything, check compatibility. Not every iPhone or Mac supports this feature.
iPhone requirements:
-
iPhone XR, XS, or newer (any model from 2018 or later)
-
iOS 16 or higher installed
Mac requirements:
-
macOS Ventura (13) or newer installed
-
Any Mac that runs Ventura or later (most models from 2017 onward)
Other needs:
-
Same Apple ID on both devices
-
Two-factor authentication enabled on that Apple ID
-
Wi-Fi and Bluetooth turned on (both devices)
-
Handoff feature enabled
If your iPhone is older than an XR or stuck on iOS 15, this will not work. No workaround exists. You would need a third-party app like Camo instead .
How to Enable Continuity Camera on Mac and iPhone?
Setting this up takes two minutes. Follow these exact steps.
Step 1: Sign into the Same Apple ID
Open Settings on your iPhone. Tap your name at the top. Look at the Apple ID listed.
On your Mac, open System Settings. Click your name at the top. Compare the Apple ID.
If they do not match, sign out of one device and sign back in using the same account.
Step 2: Turn on Two-Factor Authentication
Still in your Apple ID settings on iPhone, tap Password & Security. Check that Two-Factor Authentication is On. Most modern Apple accounts have this enabled by default.
Step 3: Enable Continuity Camera on iPhone
Open Settings on your iPhone. Tap General. Then tap AirPlay & Continuity (labeled AirPlay & Handoff on some iOS versions). Scroll to the bottom. Find Continuity Camera. Toggle it ON.
You Must Also Like: How to Remove Installed Apps from Mac Easily And Safely?
If it was already on, toggle it off, wait five seconds, and toggle it back on. This refreshes the connection system.
Step 4: Enable Handoff on Both Devices
On iPhone: Settings → General → AirPlay & Handoff → Handoff → ON.
On Mac: System Settings → General → AirDrop & Handoff → “Allow Handoff between this Mac and your iCloud devices” → ON.
Step 5: Connect Wi-Fi and Bluetooth
Both devices must have Wi-Fi and Bluetooth enabled. They do not need to be on the same named network, but they do need to be on networks that can see each other. Bluetooth must stay on even if nothing is paired.
Step 6: Position Your iPhone Correctly
Place your iPhone within a few feet of your Mac. Lock the screen. Position it in landscape orientation (horizontal) with the rear cameras facing you. The rear cameras are the high-quality ones on the back. Do not use the selfie camera.
You can buy a mount or stand to hold your iPhone above your Mac screen. I use a simple magnetic mount that clips to my display. Costs about $15. Works perfectly.
Using Your iPhone as a Webcam
Once everything is set up, open any video app on your Mac. FaceTime. Zoom. Google Meet in Chrome. Webex. Riverside. Whatever you use.
The app should automatically detect your iPhone camera. You will see “iPhone Camera” appear in the camera selection menu. Select it. That is it.
In FaceTime: Click the Video menu in the menu bar. Choose your iPhone.
In Zoom: Click the arrow next to the camera icon. Choose iPhone Camera.
In Webex: Click video options before or during a meeting. Select your iPhone from the camera list.
Your iPhone microphone also becomes available as an audio source. You can select it separately if your Mac’s mic is poor.
Cool Features You Get
Continuity Camera is not just about better video. You also get iPhone camera effects on your Mac calls.
Center Stage: The camera follows you as you move around. Great for presentations or if you fidget.
Portrait Mode: Blurs the background behind you. Hides messy rooms instantly.
Studio Light: Brightens your face while dimming the background. Works like a professional ring light.
Desk View: Shows your face AND a top-down view of your desk. Incredible for product demos or drawing tutorials.
You control these effects from the Control Center on your Mac during a call.
Continuity Camera Not Working? Fix It Fast
This feature is reliable, but it fails sometimes. Here is the exact troubleshooting order that fixes 95% of problems.
Check 1: Unlock Your iPhone
If you just restarted your iPhone, unlock it once. Lock it again after. The first unlock “wakes up” the background services Continuity Camera needs.
Check 2: Restart Both Devices
This solves more problems than you think. Restart your iPhone. Restart your Mac. Then reopen your video app. The camera usually appears.
Check 3: Turn Wi-Fi and Bluetooth Off and On
On both devices, toggle Wi-Fi off, wait five seconds, toggle it on. Do the same for Bluetooth. This clears connection glitches.
Check 4: Disable Personal Hotspot
If your iPhone is sharing its mobile connection, Continuity Camera will not work. Go to Settings → Personal Hotspot → turn it OFF.
Check 5: Disable VPN on Mac
VPNs interfere with the connection between your iPhone and Mac. Disconnect from any VPN temporarily while troubleshooting.
Check 6: Move Devices Closer
Keep your iPhone within 3 to 10 feet of your Mac. Walls, other electronics, and distance weaken the signal.
Check 7: Check Browser Permissions
If you are using Chrome, Brave, or Edge: go to site settings. Make sure camera access is allowed and that your iPhone is selected as the camera device, not your built-in Mac camera.
Check 8: Update Everything
Old software breaks Continuity Camera. Check for iOS updates on your iPhone. Check for macOS updates on your Mac. Even minor patches (like 16.6.1 to 16.6.2) often contain connection fixes.
Known Beta Issue (January 2026 Warning)
Here is a real-time warning. Apple confirmed that iOS 26.3 Beta 3 breaks Continuity Camera on iPhone 17 models and M5 iPad Pros. The wireless connection fails completely.
If you are running that beta, downgrade to a stable version or wait for the next beta release.
How to Turn Off Continuity Camera on Mac?
Sometimes you want your iPhone to stop acting like a webcam. Maybe you need to save battery. Or you want to use your Mac’s built-in camera again.
Here is the honest truth. How to turn off Continuity Camera on Mac is not obvious because there is no “off” switch on the Mac side. The feature lives on your iPhone.
To disable it completely: Open Settings on your iPhone → General → AirPlay & Continuity → Continuity Camera → toggle OFF.
To temporarily stop the connection without disabling the feature: Quit the video app that is using your iPhone camera. Right-click the app in your Dock and select Quit. The camera disconnects. Next time you open that app, your iPhone will reconnect automatically.
You can also just lock your iPhone. Continuity Camera pauses until you unlock it again.
The One Real Downside
Battery drain. Your iPhone’s battery drops fast when used as a webcam. A one-hour call can eat 20-30% battery easily.
The fix is simple. Plug your iPhone into your Mac or a wall charger while using Continuity Camera. The feature works over USB as well as wireless. A wired connection also provides more stable video.
When to Use a Wired Connection?
Wireless works fine for most calls. But for critical recordings or long meetings, use a cable. Plug your iPhone into your Mac via USB. The connection becomes rock solid. No interference. No dropouts. Plus your iPhone charges while you use it.
To use wired mode, just plug it in. Your Mac detects the iPhone automatically. No settings to change.
The Final Thoughts
Continuity Camera on macOS Ventura and iOS 16 turns your expensive iPhone camera into your everyday webcam. It is free. It is built-in. And once you use it, you will never want to go back to that grainy built-in Mac camera.
Set it up once. Mount your iPhone above your screen. Join your next call. The difference is immediate. Sharper image. Better lighting. Professional-looking video without spending $200 on a dedicated webcam.
And when it does not work? Run through the checklist. Unlock. Restart. Check Wi-Fi. Update software. The fix is usually simple.
Try it today. You have nothing to lose except bad video quality.